E12 | Gas Fireplace, Wainscoting | Ask This Old House
Season 23 Episode 12 | 23m 42sVideo has Closed Captions
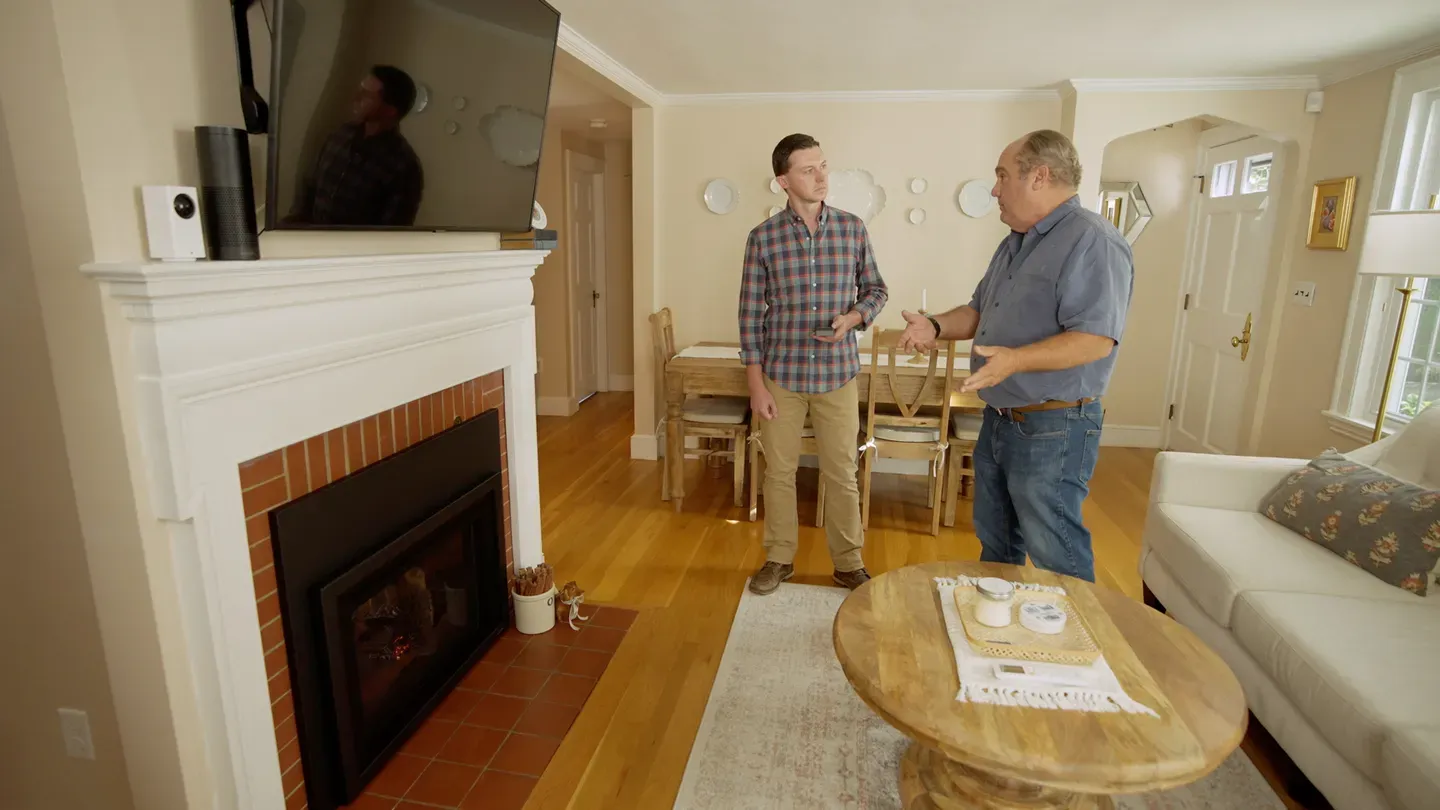
Richard helps convert a wood burning fireplace to gas; Nathan installs wainscoting.
Richard Trethewey assists a homeowner through the process of converting a wood burning fireplace to gas, assembling a team to do the electrical, gas hookup, and insert installation; Tom Silva brings in a metal, pointy item for the crew to guess What Is It? Nathan Gilbert helps a homeowner install flat panel wainscoting in his dining room.
Problems playing video? | Closed Captioning Feedback
Problems playing video? | Closed Captioning Feedback
Funding for THIS OLD HOUSE is provided by The Home Depot.
Support provided by:

E12 | Gas Fireplace, Wainscoting | Ask This Old House
Season 23 Episode 12 | 23m 42sVideo has Closed Captions
Richard Trethewey assists a homeowner through the process of converting a wood burning fireplace to gas, assembling a team to do the electrical, gas hookup, and insert installation; Tom Silva brings in a metal, pointy item for the crew to guess What Is It? Nathan Gilbert helps a homeowner install flat panel wainscoting in his dining room.
Problems playing video? | Closed Captioning Feedback
How to Watch Ask This Old House
Ask This Old House is available to stream on pbs.org and the free PBS App, available on iPhone, Apple TV, Android TV, Android smartphones, Amazon Fire TV, Amazon Fire Tablet, Roku, Samsung Smart TV, and Vizio.
Keep Exploring

This Old House Insider Newsletter
Get This Old House exclusive stories, tips, and behind-the-scenes information delivered right to your inbox every month.Providing Support for PBS.org
Learn Moreabout PBS online sponsorship♪♪ Kevin: On "Ask This Old House," our experts travel across the country to answer questions about your house.
♪♪ Today, Richard helps a homeowner convert their wood-burning fireplace to gas.
Then it's spring-loaded with two different metal tips.
What is it?
Richard: This brings back so many memories of my great-great uncle Eephus.
Kevin: Oh, Eephus and Morphis?
Richard: Eephus and Morphis Trethewey.
He was unbelievable.
Kevin: And Nathan gives a dining room a facelift by installing wainscoting.
On "Ask This Old House."
♪♪ Richard: I'm on my way today to do a project to convert a wood fireplace to a gas insert.
Now, a gas insert has no visible flames, so it's a lot safer.
There's less chance of a house fire, and there's no fumes or odor that gets into the building.
Our homeowner is a firefighter, so he knows about some of the safety issues.
Now, this is not a DIY project, so we've assembled a team.
We've got the new insert being delivered today, and we've got licensed professionals for the gas and the electric that we need to do.
Heath Eastman for the electrical, and a friend of mine to do the gas all so we can get it done in one day.
♪♪ ♪♪ Les?
Les: Richard.
Richard: Nice to finally meet you.
Les: Yeah.
You as well.
Come on in.
Richard: Talked on the phone.
Do you know that you have a few planes flying over here?
Les: We do.
Yeah.
We're pretty close to the airport here.
Richard: Well, it's a great neighborhood.
I tell you, this house is spectacular.
Les: Oh, thank you.
Richard: Level of detail.
All the decorations.
Did you do any of that?
Les: It's all my wife.
Richard: But you wrote about the fireplace.
Les: We did.
Yeah.
So we've been here about a year and use the wood-burning fireplace a few times, but it's been hard to keep lit and the smoke smell kind of lingers for a few days after.
Um, I'm also a firefighter, so I was, like, pretty conscious about leaving the damper open all night to make sure the embers burn out.
So we were really looking for an alternative, and we're excited to have a gas insert now.
Richard: And that's the thing about a wood fire -- you know, you get it going, you get it going, and you worry about the embers coming out and then, you know, oh, yeah, you got this.
So you have to close this after it's done, but you can't do it until it's completely out.
So you got to wake up in the middle of the night, and otherwise all the heat in the building gets pulled out through that natural flue.
Les: Right.
Richard: You are not alone.
I mean, gas fireplaces are very popular for a lot of reasons.
One is this convenience.
You know, you turn it on, it's on, you use it and you turn it off, and then it's completely sealed.
So all the air for combustion comes from outside exhausts to there, so you don't lose all the heat from the building going there.
So you're not alone.
So your wife and I went shopping and we found a new unit.
But you had some homework.
Les: I did.
Richard: Okay, to get the chimney cleaned and checked.
Les: Yep.
That's been done.
Richard: Good.
Carbon monoxide detector?
Les: Ready to go.
Richard: Alright.
And then before we went shopping, we measured here to be sure that the unit would fit into this firebox.
And we found, I think, the perfect unit.
And it's here.
Come on.
Les: Oh, excellent.
So, Les, Jimmy and Kevin are going to help us with the venting of this product today.
Les: Nice to meet you guys.
Jimmy: Good morning.
How you doing?
Richard: So you haven't seen this yet?
Les: I haven't.
Richard: Your wife picked it out and she has really good taste.
Les: Yes, she does.
Richard: So these things look like pre-burned logs, and they'll last like this forever.
It has a cover to seal it up.
It'll be beautiful.
We have a gas connection here and an electrical.
But you guys are going to make sure we vent this thing properly.
So take us through that.
Jimmy: Because this is a sealed combustion chamber, it requires two tubes to go from the top of the unit to the top of the chimney.
Richard: Yeah.
Jimmy: And then we'll cap it off with this flashing.
And these are the tubes that we'll attach it to, which is great.
Richard: They can pull to expand whatever length you need?
Jimmy: Correct.
And it'll attach to the top of this cap with an air intake and an exhaust.
Richard: And that's what it's going to look like at the top of the house?
Jimmy: Correct.
This piece here is going to seal off the top of the chimney, Richard: Yeah.
Les: And we have an old spring-loaded damper that we have to open and close when we want a fire.
Do we still need that?
Jimmy: No.
That's going to get eliminated for this system to take its place.
Richard: And this is all controlled by a clicker?
Kevin: Yes.
This remote right here.
Richard: Perfect.
Total control.
Kevin: That's right.
Richard: We'll let you guys get up on the roof.
Alright.
We're going to meet two more people -- electrical and gas.
Hello there.
Heath: Hey, Richard.
Richard: We meet at all the best basements.
Heath: [ Laughs ] We do.
Richard: Nice to see you.
Heath: Good to see you.
Richard: Say hello to Les, our homeowner.
Heath: Hey, Les.
Nice to meet you.
Les: Nice to meet you.
Richard: So take us through what you have to do.
Heath: I finally have an easy job today.
This is great.
So, we're putting a gas fireplace insert in.
And the nice thing is, they really don't use much power.
Might use a fan at most.
But other than that, it's ignition, so I don't need its own circuit to go to it.
And the bonus part is, Les, you've had a lot of the living room rewired already.
So we have new wiring, new circuit breaker, everything over to a junction box right here, which is great.
So for me, I want to install a metal box.
And the reason is I'm going to run metal wire up there.
So I want this to plug into this nice and easily.
Richard: Of course you'd use metal.
Heath: And the reason for the metal wire is we're going to be going through the masonry.
So with this, we had an ash dump that came from top to bottom.
Pretty much have a hollow chase.
Richard: And we'll never need that ash dump again?
Heath: Shouldn't need it again.
So I'm going to simply drill through the masonry here, pull the wire up through the cleanup up top, put the receptacle in and tie it back in.
No need for a safety switch.
We have one on the unit so everything should be good.
Richard: You'll be done by lunch.
Heath: Piece of cake.
Richard: Alright.
Thanks, brother.
Heath: Thanks.
Richard: Thanks for your help.
Alright, now, Billy, you're going to help us with the gas fitting.
Say hello to Les, our homeowner.
Billy: Hey, Les, how are you?
Les: Nice to meet you.
Richard: So for you, what's the challenge here?
Billy: It's actually pretty easy.
We have the gas main coming across the outside of the house here.
And they left a one-inch T here that I could come off and run my new gas piping for the fireplace.
Richard: Did they know you were coming?
Billy: Yep.
Richard: That's great.
It makes it easier, doesn't it?
Billy: Yep.
Richard: Alright.
So you'll come off the T. Billy: Uh-huh.
And then I'm going to run my gas pipe along these joists here.
And then we're going to core a hole through into the chase and then connect the gas fireplace with a flexi.
Richard: Okay.
Great.
And you'll file permits for us?
Billy: Yep.
Richard: Great.
Well, thanks for your help.
Billy: Yep, thanks.
Richard: We'll be back to see you.
♪♪ ♪♪ ♪♪ Billy starts by shutting off the gas supply.
Then he installs a shutoff valve from the existing T for the new gas line.
Threads sealants used to create a tight seal to ensure that there are no gas leaks.
♪♪ The installers dropped down two liners into the firebox, one to take in fresh air.
Thank you!
Keep coming!
The other to vent carbon monoxide and other toxic gases out of the house.
Jimmy: Okay, we're good!
♪♪ Richard: Alright, so we're ready to make our final connections, I hope.
Jimmy: We are.
Yeah.
We need to take this slide plate off and connect our intake and exhaust.
Richard: Okay.
So that'll be cut short.
Jimmy: That'll be cut short.
Richard: Onto there.
That's great.
And that'll make a perfect connection right there.
Jimmy: It makes a perfect connection.
The line is attached.
Slide it in.
Richard: Then make a nice tight seal.
Jimmy: Correct.
Richard: Alright.
We are ready to go.
Jimmy: Yeah, we are.
♪♪ ♪♪ ♪♪ ♪♪ Richard: Billy makes the final gas connection.
He purges a little bit of air out of the line and double-checks his work with a soapy water leak detection test.
If there's any escaping gas, bubbles will appear, allowing Billy to pinpoint the leak.
♪♪ ♪♪ ♪♪ Alright, so we're all cleaned up and connected.
What do you think?
Les: That looks great.
Richard: It looks like it's always been here.
Les: It does, yes.
Richard: Alright.
So you've got an operating control right here.
Les: Okay.
Richard: Another clicker.
So it's got the obvious stuff.
You know, it's got the on/off for the flame.
But it also has a fan, has a thermostat.
You can set the flame height, and there's a timer too.
So you can turn it on, it'll go off automatically.
Give it a try.
[ Beep ] Now, these -- these embers, and they're made out of fiber cement and the logs.
So they're going to look that way.
They glow a little when they're running, but they'll look that way forever, which is great.
Les: Oh, perfect.
And if we lose power, can we still use this?
Richard: Yeah.
There's a battery backup.
And the battery backup, though, will only be for the flame.
It won't have enough power in it to run the fan, but you'll still have heat from the flames, so that's nice to have, reassuring, if your main heating system went out too.
Les: Excellent.
Yeah.
Richard: So it took a village.
We had a whole team, but we got it done.
Les: Yeah, thank you.
I appreciate it, Richard.
Richard: I wish you the best.
Les: Yeah, you too.
Richard: Alright.
Be good.
Stay warm.
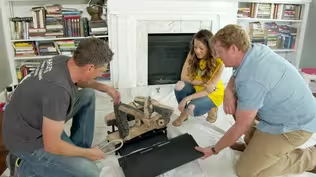
♪♪ ♪♪ Tom: Alright, gentlemen.
And I use that term very loosely.
Mark: Ow, ow.
Tom: Alright.
So, it's got a spring on it.
Look at it.
It's flexing.
Richard: Oh, yeah.
Tom: Got some tension.
Got a little bit of flexible to it.
It's got two tips on each side and one's a little bigger than the other one.
Kevin: Aha, aha, aha.
Tom: What is it?
Richard: I remember it.
Oh, really?
Kevin: I've been looking for it.
Richard: Okay.
Mark: Alright, alright.
Kevin: You guys know my smile's everything, right?
Tom: Yeah.
Kevin: It has to be maintained, right?
Mark: We were just talking about that.
Tom: Such a happy-go-lucky man.
Kevin: Floss all the time, right?
You know, so if you have, like, a doughnut, you floss, right?
But if you step it up to, like, a ham sandwich, you need a toothpick.
Richard: Yeah.
Kevin: But then corn, celery, ribs.
Richard: Hanging like this.
Tom: Geez!
[ Laughs ] Kevin: This thing is like a spring-loaded toothpick made out of metal.
So if I get a piece of a rib up there or corn over there, I just take this.
I set it right up to it, knock it, and... Ooh!
Tom: Oh, geez!
Kevin: Works every time.
Richard: Seems sensible.
[ Laughter ] Mark: Alright, alright.
Kevin: It's all about the smile.
Tom: That's not it, sonny.
Kevin: No?
Tom: Not it, no.
Kevin: Oh.
Mark: Alright.
Well, I'm going to give you guys a little info about me.
Richard: Yes.
Mark: Yeah.
I have two of these in my truck already.
I could be going down a side street.
I could be down the highway.
But when I have an urge...
This is my bricklaying hand.
I can't get it dirty.
Richard: "I can't get it dirty."
Kevin: That's been in my mouth.
Tom: Oh!
Mark: Then I'm going to pass it to Richard.
If that's not what it is, I don't know what it is.
Richard: This brings back so many memories of my great-great uncle Eephus.
Kevin: Oh, Eephus and Morphis?
Richard: Eephus and Morphis Trethewey.
He was unbelievable.
He was in the plumbing industry, but he didn't know how to trust.
He didn't trust.
You know, when the copper pipes first came out... Kevin: No trust.
Richard: It used to be they had lead pipes and then they had these.
And he just didn't trust.
And so this is what he carried in his little overalls.
Kevin: Oh, he was a little guy?
Richard: Yeah.
I got to know him before he passed.
It was great.
And he would take and he would just double-check that that fitting was exactly 90.
And still didn't trust.
Mark: That's the way to do it.
Tom: With a flexible... Richard: Yeah, yeah.
[ Laughter ] Richard: You want this or this?
Tom: Yeah, I want that.
Alright.
Kevin: Long proud history of plumbers.
Richard: Yeah, yeah.
That's right.
Tom: You guys are really bad.
Mark: No, no, no.
Tom: You with no teeth.
Oh, boy.
Mark: That hurt.
Right?
Tom: Alright, so I've had one of these and used them for many years.
I'm going to give you a little tip.
If you've ever done trim work, like maybe a crown molding window trim, casing, whatever, finished nail, once in a while, the nail doesn't set where you want it to set.
So you got to push it down a little bit deeper.
This is very handy.
There's two different sizes for two different size nails.
You take it and you position it on the center of the head.
Hold it down tight.
You pull up.
Boom.
You let it go.
Richard: Ooh!
Feels like breaking teeth.
Tom: Sets that nail right down perfectly.
So that's what it is.
Mark: Okay.
Richard: Wow, is Uncle Eephus... Mark: I've been wrong all these years.
Richard: [ Laughs ] ♪♪ ♪♪ Bridger: Hey.
Nathan: Hey, Bridger.
Bridger: Hey, Nathan.
Welcome.
Nathan: Nice to meet you.
Bridger: Yeah, great -- Great to have you.
Nathan: Beautiful house.
Bridger: Thank you so much.
Nathan: How long have you guys been here?
Bridger: We moved here in 2013.
Nathan: 2013?
Nice.
Bridger: And previous owners have been here 50 years, and so there was a lot to do.
Nathan: Yep.
Bridger: We redid the kitchen and the bathrooms, but the dining room never really got the attention it deserved.
Nathan: So you saved me a project?
Bridger: I saved you a project.
Nathan: Good, good.
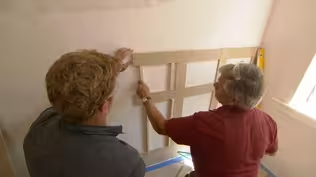
You wrote me about wainscoting, and I think this would be a great addition to put it into this room.
You know, over the years in homes like this, they would have added wainscoting to the lower third of the wall to protect it from the chairs or the kids running around.
Got to keep the plaster looking good.
You got raised panel, flat panel, walled panel.
You could add beadboard, tongue and groove, V-groove.
So we have a lot of options, but I think it would look beautiful in this room.
We have a lot of smaller kind of broken up little pieces of wall.
So each wall is actually going to be a little bit custom to what we're given.
Bridger: Yeah.
We were worried about how to figure out behind the piano, and how to... Nathan: We'll do a little bit of that there.
We try and break it up evenly if we can, but around the radiators we're kind of forced to do a certain layout over there.
Over here, nice clean wall.
You know, we'll probably break this up into two spots.
But one thing I like to do is look around the house.
Do you have any wainscoting anywhere else?
Bridger: We do.
We have some in the bathroom.
Nathan: You enjoy the look of it?
Bridger: I do.
Nathan: Alright.
We'll try and match that.
Let's go take a look.
Bridger: Okay.
The bathroom's right over here.
This is one of the ones we renovated.
Nathan: Alright.
Bridger: And we put this wainscoting in.
Nathan: Oh, this is great.
So, like a flat panel or just a general paneled look is what you guys like?
Bridger: Yeah.
Nathan: Perfect.
We can do that.
Bridger: Great.
Nathan: So now we have our design.
A nice, simple, wall paneled look.
We need to talk about the height that we want to finish it at.
Anything between 36 and 42 inches looks nice in an older home.
We wouldn't want to go too high like you might do in a modern home.
I think it'll finish nice at 36.
It'll protect the wall.
Nice, easy look.
What's great too, about the wall panel look is it's going to be really flat against the wall.
The wall will become the panel.
If you went with a raised panel or a flat panel, that might come out past your back band.
So you're going to have to change a lot of things if you do that.
As far as layout, we know about three feet high.
I'll probably just cut a three-foot stick as my guide as we go around and do our little wall sections.
I'm not going to set up a laser in an older home.
I don't want anything to be pitched down if it's settled.
I think we just need to move that piano and we can get started.
Bridger: Alright.
Nathan: Perfect.
That's enough space right there.
Bridger: Is that good?
Nathan: Yeah.
Bridger: Alright.
Nathan: Need a pencil?
Bridger: Thanks.
Nathan: Alright.
To get started, we're going to pull your existing base cap.
To do that, we're going to score the top and the bottom with a utility knife.
And then we'll take a pry bar and a shingle.
And we'll go around the room and we'll gently ease it away, trying not to damage any of the wall.
[ Cracking ] You can hear that seal breaking.
Bridger: Yeah.
Nathan: Sneak in there.
Okay.
And then we'll just work our way along.
Okay.
Alright, so we got nails about every 16 inches.
Alright.
Alright.
So we have our gauge stick cut to the height we like.
I added this little buildout on the back side so that way it's nice and plumb with the baseboard.
I'm just going to sit that right on the ground.
Strike a line in that corner and come over here.
Be the process and then I'll use a real fine chalk line.
We'll snap it.
And what I did is I made it a little bit shorter.
This will be the top of our upper rail.
And then we'll cap it on the chair rail so any of our lines will disappear.
If you want to snap right in the middle.
Bridger: Okay.
Nathan: Good.
Cool.
Bridger: Okay.
Nathan: Alright right there.
Cool.
Alright.
We got our piece cut, do a dry fit and check it.
I have a little scrap with a miter on it, so that'll return it nicely there.
Bridger: Nice.
Nathan: So we're going to add a little bit of construction adhesive to the back side to help get a better bond to the wall.
We'll just work to that line.
So we'll do a couple of nails in the corner.
And then go down to here.
There.
And then if we go down below, we have our old base cap.
Bridger: Yep.
Nathan: I checked.
That was actually nailed into the studs.
So I can bring that layout up top so I can come over 12 1/2 and 27 3/4.
12 1/2, 27 3/4.
So we know now when we nail through, we should be going through the plaster into a stud.
Perfect.
Just regular wood glue for these miters.
And then we got construction adhesive on the back side there.
So I'm going to set my left and my right style.
So this one I'll tuck right in this corner here.
What is half of 37 and 3/16?
Bridger: 18 and 5/8?
Nathan: You are correct.
Bridger: [ Laughs ] Nathan: So we'll go 18 and 5/8.
What is half of 3 1/2?
Bridger: 1 3/4.
Nathan: So now we'll take that.
We have our center and our center.
So now we know that's where we want to be.
Alright.
So we got our piece.
We need a little bit of construction adhesive on it.
Alright.
So we have our base cap here.
We're going to start to do is trim the around the inside.
And I'm just going to use a small brad nailer Smidge and a quarter of brads.
♪♪ ♪♪ ♪♪ ♪♪ ♪♪ ♪♪ ♪♪ So to finish things off, I picked up some of this bullnose.
It's a real simple detail, but it'll cap the top.
Give it that finished look.
♪♪ Go for it.
Bridger: Is the bullnose a traditional cap?
Nathan: Yeah.
It's very traditional to apply the bullnose to the top.
♪♪ One thing I like to add underneath, which is very traditional, is a small piece of scotia.
See how that kind of finishes off that seam?
Bridger: Excellent.
♪♪ ♪♪ Wow.
What a great job.
Nathan: You are good to go.
What a day.
I mean, it really blends in.
But wait until you see it painted.
It's going to be perfect.
Bridger: This is quite a transformation.
Nathan: Good.
A little bit of homework though.
Little putty, little caulking, a little painting.
Bridger: Alright.
Nathan: But you were saying you might get the house painted.
So a good time to call the guys inside and finish it up.
Bridger: Got it.
Nathan: Well, enjoy.
Bridger: Thank you, Nathan.
I really appreciate it.
Nathan: You're welcome.
Anytime.
♪♪ ♪♪ ♪♪ Kevin: Next time on "Ask This Old House," Jenn gets a lesson in beekeeping.
Woman: Yeah, so these girls are busy at work.
Jenn: Oh, my God!
Kevin: Then our team shares some apps that help make their lives easier.
And Tom gives a new tool a test drive as he builds a toddler stool.
Tom: It looks good.
Kevin: Looks better than good, Tommy.
That thing looks awesome.
All that on "Ask This Old House."


- Home and How To

Hit the road in a classic car for a tour through Great Britain with two antiques experts.


Support for PBS provided by:
Funding for THIS OLD HOUSE is provided by The Home Depot.