Shaker Box
Episode 108 | 26m 46sVideo has Closed Captions
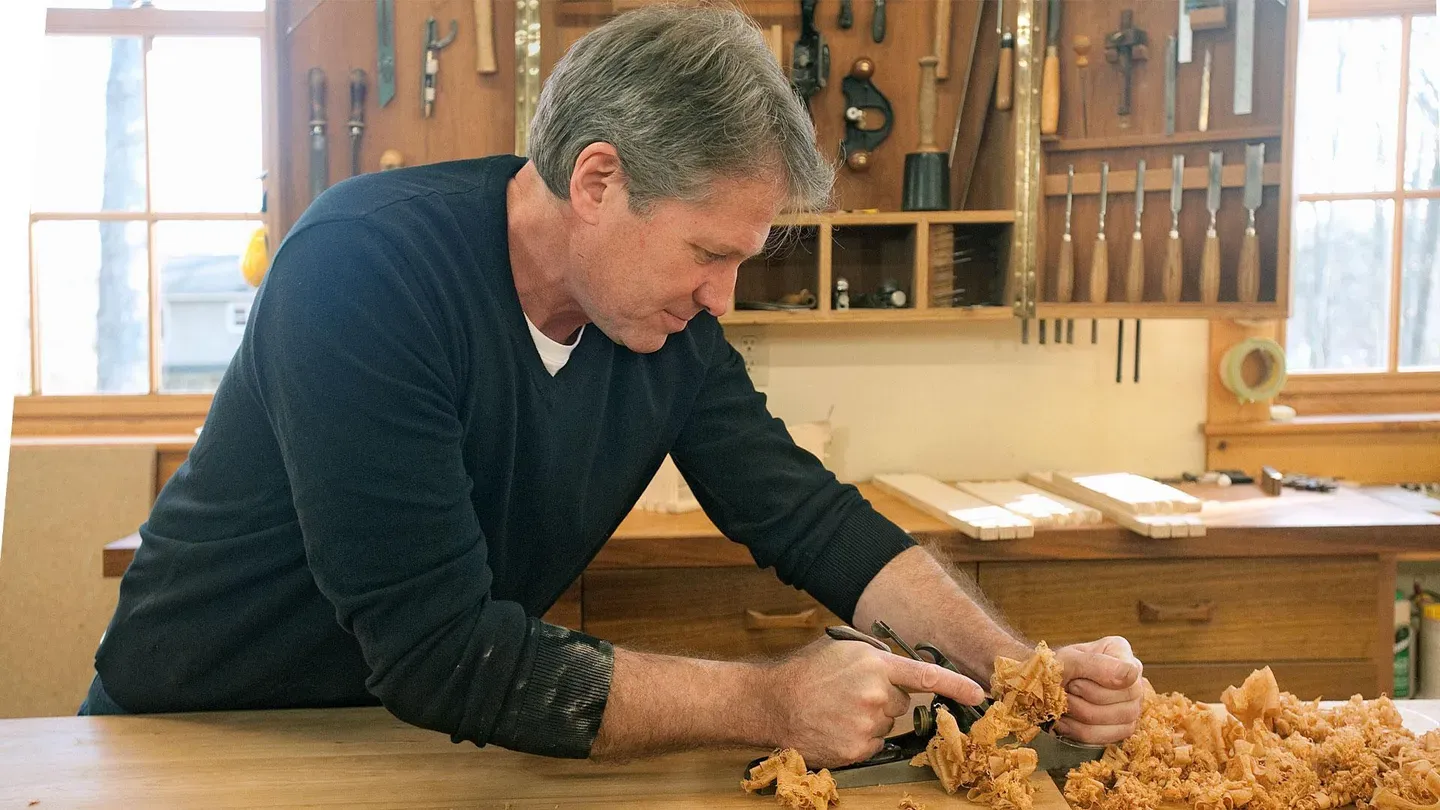
Tom collaborates with guest John Ryan to craft authentic reproduction Shaker oval boxes.
Host Tom McLaughlin collaborates with guest John Ryan to craft authentic reproduction Shaker oval boxes out of cherry on this episode of Classic Woodworking. These boxes are iconic because of their utility and potential for customization in size and shape. John shows Tom his Shaker technique for bending strips of wood around a form, creating a smooth and beautiful Shaker box.
Problems with Closed Captions? Closed Captioning Feedback
Problems with Closed Captions? Closed Captioning Feedback
Classic Woodworking is presented by your local public television station.
Distributed nationally by American Public Television
Shaker Box
Episode 108 | 26m 46sVideo has Closed Captions
Host Tom McLaughlin collaborates with guest John Ryan to craft authentic reproduction Shaker oval boxes out of cherry on this episode of Classic Woodworking. These boxes are iconic because of their utility and potential for customization in size and shape. John shows Tom his Shaker technique for bending strips of wood around a form, creating a smooth and beautiful Shaker box.
Problems with Closed Captions? Closed Captioning Feedback
How to Watch Classic Woodworking
Classic Woodworking is available to stream on pbs.org and the free PBS App, available on iPhone, Apple TV, Android TV, Android smartphones, Amazon Fire TV, Amazon Fire Tablet, Roku, Samsung Smart TV, and Vizio.
>> TOM: This week on Classic Woodworking, we're making a classic Shaker oval box with expert box-maker John Ryan.
These were really popular items and were made in all the Shaker villages across the country.
They are functional and beautiful containers-- the Tupperware of the 19th century.
Our box today will be made out of beautiful New England cherry.
And that's all coming up next, right here on Classic Woodworking.
♪ ♪ >> Funding is provided by: >> Woodworking is a passion.
Woodcraft understands that.
We offer name brands and tools for fine woodworking.
Woodcraft, proud sponsors of Classic Woodworking.
And by Felder.
>> It's not only about work.
It's about fun and success.
We are with you.
Felder Group is your partner for your woodworking projects.
>> And by SCM-- a rich heritage of woodworking technology since 1952.
>> TOM: So these are our Shaker oval boxes.
They're beautiful.
They come in all sizes and shapes and different kinds of woods.
And what's really cool is they nest inside each other.
All these boxes could fit in this one on the bottom.
And they're so cute, too, down to the smallest size.
Well, our guest today made all these boxes, and he supplies many boxes to the Shaker villages in the area, even Canterbury Shaker Village, which is just a mile from the shop.
In fact, he's been doing this for 28 years.
Our guest today is John Ryan.
Hey, welcome, John.
>> Thank you, Tom-- thank you for having us.
>> TOM: Oh, I'm thrilled to have you here.
28 years?
>> 28 years.
>> TOM: What has got you started, and what's kept you going so strong all this time?
>> Well, it was a career change, and took a class at the Canterbury Shaker Village.
We learned the traditional box and made a lot of traditional boxes, and then I began to realize that the creative ideas that... could come from adaptations.
And so we began our adaptations, and that's what's kept us going, is those unique things we do that are very artistic.
>> TOM: Yeah, this is an awesome adaptation, as you call it.
>> Yes.
>> TOM: It's actually, like, a little jewelry box.
>> It's an earring case, and everything is the same techniques.
The lappers, the lappers in the trays, comes together.
>> TOM: We're going back to the classic Shaker oval box for our box today.
The middle of the stack, number five size.
Now, we'll start by making the sides, and that begins by laying it out.
>> Mm-hmm.
>> TOM: So let's get started.
>> All right.
>> TOM: So we'll be making our box out of solid cherry, and we'll get our sides out of a board just like this.
Now, the board is resawn on the bandsaw, and then run through a drum sander to create this thickness stock.
It's a little over a sixteenth of an inch thick, it's three and three-eighths wide to make the height of our box, and the lid is just under an inch wide to make that top band.
Now, John, the classic shape we see on these Shaker oval boxes are these here.
What are these?
>> These are lappers, or fingers, depending on the size of the box.
As you can see here, the bigger the box, the more lappers we have.
It's a classic look, it helps them lay down flatter, because there's less material here, and fasten it with the copper tacks.
>> TOM: We're going to be making several at once, because it's more efficient.
>> Mm-hmm.
>> TOM: So we've got four stacked and taped together, and now we have to lay out these lappers.
>> So we have a template, and there's a template for each size.
This is the number five.
What we'll do is we'll lay it on here for the box.
>> TOM: Okay.
>> Coming out to the tip.
>> TOM: Yep.
>> And we're going to be using both this for cutting the lapper.
>> TOM: Mm-hmm.
>> We'll start with the bandsaw, getting close, and then each of these is going to tell us where the copper tack lies.
>> TOM: Okay, these little tacks, here.
>> Yes, the copper tacks are also... and the copper tacks are strategically placed.
For instance, these two tacks here flank this swallowtail so that it keeps the swallowtail from splitting when we wrap the box.
>> TOM: Ah, okay.
>> So... so there's our box.
>> TOM: All right.
>> And then we have our lid.
>> TOM: Mm-hmm.
>> And we try to use the same piece of wood.
For instance, this lid has been cut off of this band, so we're staying with the same color.
>> TOM: So we get both the lid band and the body of the box band.
>> Correct, correct.
>> TOM: And keep them organized so you have the same color.
>> So you have the same color, so that you can see... you can almost see it in the grain, but you can certainly see it in the color that this came off the same band.
>> TOM: Yeah, that looks great.
>> So now, what I do is I go ahead and start our hole here.
>> TOM: Okay, because we have to pre-drill these holes?
>> We have to pre-drill the holes.
So the pencil marks from the template, we're going to set a hole for the sixteenth-inch drill bit.
Now.
>> TOM: That looks awesome.
So these are all ready for the drill press.
I'll head over and drill them out.
(drill running) So I've got the holes all drilled out.
How'd I do, John?
>> Look good, look good.
>> TOM: Oh, thanks.
Well, now, you want me to bandsaw out the lapper shapes, but you don't want me to bandsaw right to the line?
>> Correct.
Each lapper is hand-carved, but we take out most of the material at the bandsaw.
>> TOM: Okay.
>> So what I want you to do is I want you to come off the line quite a bit to leave enough of the meat for us to carve.
So you're going to come in about this close.
>> TOM: Mm-hmm.
>> We'll separate from the tape, and then we'll do each one on our cutting anvil.
(bandsaw running) >> TOM: So I've got them all sawn out, John, and we've taken the tape off, so we've got our individual layers.
And now we're ready to carve.
>> Mm-hmm.
>> TOM: Now, you told me we were going to use an anvil.
>> Mm-hmm.
It's for the support we need when we're doing our carving-- that's all it is for.
>> TOM: Okay.
So I'll lay down the first one, and you can position it at the end there.
>> Okay, so we come to the tip of the anvil, and then we draw it out about a quarter-inch, because we don't want to carve the anvil, we just want to carve the box.
>> TOM: Okay.
All right, I'll use this holdfast.
And then I'll put another clamp right up close... >> Mm-hmm.
>> TOM: ...for you.
All right, now show me how it's done.
>> Okay, Tom-- let's begin to carve.
Now, remember, the line that we want is the pencil line that we've left.
And we actually want to start not so much on the line-- we want to be between these two tacks here, and between these two tacks here.
So we want to start in the center, want to come forward a quarter of an inch.
>> TOM: Yeah, they're more as guidelines at this point.
Okay.
>> I have to come to the location of the tacks.
So I begin by breaking the tension.
There's tension in the swallowtail.
So I come in here and I break the tension by opening up this edge for carving.
>> TOM: And you've got just a simple utility knife as your carving tool.
>> Yep, yes, this is perfect.
Keep a sharp blade-- it has to be a sharp blade.
So we begin here, using the heavier part of the blade.
We want to start 15 degrees in the back, working forward until we are vertical at the tip.
There we go, right there.
That's about the width of a hole.
>> TOM: Three swipes.
>> Three swipes, and have done it a million times.
>> TOM (laughing): You have.
>> So here we come to the other side.
And we also want to create the same distance between the edge and in that hole.
And I like that.
>> TOM: That's beautiful.
>> That's one lapper.
>> TOM: Yeah, that's nice if they have a little variation.
>> They will.
They will have a different thickness in the center.
But you do want this ten or 15 in the back, because it does really help it lie down better.
>> TOM: Okay.
>> So every lapper on every box is hand-carved.
>> TOM: Wow.
That's a labor of love.
>> Yes.
That's what some call it.
(laughter) All right, now that we've got our lappers cut, the final touch is to chamfer the tip of the top of the lapper.
>> TOM: Okay.
>> And it gives it a nice finish.
>> TOM: It's that easy.
>> And there we go.
>> TOM: So with our lappers all trimmed, the last thing we need to do before we can band our boxes is taper the ends.
>> What we need to do is we have to let the box look like a complete oval.
But we have blunt ends on either end of the band, and so we need to taper the band so that you get this look of tapered to infinity as it wraps around the inside.
You can also see it on the inside where this piece, thick as it is, then tapers down until you have it disappearing into the oval.
However, at the same time, the lappers get tapered, so they lay down better.
Now, this band is 80 thousandths.
It goes to zero here, but the lapper goes to 40 thousandths, so we take half the material off the lapper, but we take it all off to infinity in the inside.
>> TOM: That is so sweet.
I mean, the first time I looked at this box, I couldn't even see that.
>> Mm-hmm.
>> TOM: But now, that's a thin taper on this material.
>> Mm-hmm.
>> TOM: How do you do that?
>> Okay, so what we do is, as you can see, it has that blunt end.
>> TOM: Mm-hmm.
>> Would not look good if it wrapped.
So what we've got to do is we're going to taper it on our sander, we're going to come back approximately two to two and a half inches, we're going to take this to infinity, and then we're going to take these down to 40 thousandths, halfway.
(sander running) Okay, Tom, so we've finished to infinity.
>> TOM: That's pretty sweet.
>> Yep, nice edge.
>> TOM: Yep.
>> And now, in order for the lappers to lay down nice and flat, we want to take some of the material off of them.
We're going to take half.
If this is 80 thousandths, we want to take approximately 40 off the lappers.
>> TOM: Okay.
>> We will take it off to these tacks, and just a little behind them.
>> TOM: All right.
(sander running) >> Okay, Tom, so we finished the lappers.
>> TOM: That's nicely done.
>> Mm-hmm.
>> TOM: So we'll get them all in that condition, and then we'll be ready to bend our box sides.
>> That's correct, mm-hmm.
>> TOM: So now comes the fun part.
We get to bend our sides to the shape of the box.
>> Mm-hmm.
>> TOM: Now, John, you've made this beautiful form that's exactly the size of our number five box.
>> Correct.
>> TOM: So it will be bending right around that.
>> Mm-hmm.
>> TOM: And I notice you've got this reference line here.
>> Mm-hmm, right.
We begin by using this back row of tacks.
They will become our reference point and registration point from this point on.
We will use this row, so when we lay it on the mold, we're going to lay this row of tacks on that line there.
>> TOM: All right, so it's much easier to handle this if we get our mold into the vise.
But, at this point, our stock is still pretty rigid, so how do we get it to bend around this form?
>> Mm-hmm, right.
Well, what we do is we do a water bath.
Some do steaming.
We use a water bath, and we use a little glycerin to soften them a little more.
We leave them in here about 40 minutes.
We'll move quickly.
We will slide the fibers, wrap it around.
If it cools down, you'll break the fibers.
>> TOM: Okay.
>> So we'll need to move quickly, go from here to here without hesitation.
>> TOM: So let's start moving, John.
>> Okay.
Now, remember, we're going to line up the back row of tacks... >> TOM: Okay.
What a beautiful color.
>> ...on the top on that line.
>> TOM: Okay.
>> And then I'm going to tip it under, and you're going to grab that tail, Tom.
>> TOM: All right.
>> And you're going to pull.
And then you're going to tuck underneath.
>> TOM: Okay.
>> Yep.
And I'm going to come back down on top.
>> TOM: All right.
>> And that... we then register the two bands with this kind of a registration mark.
All right?
Now, I'm going to release it about a quarter of an inch.
>> TOM: All right.
>> Keeping it oval, I'm going to slide it off.
>> TOM: Okay.
>> Now, if I can step into here, what I'm going to do is I have to come back approximately to the registration.
>> TOM: Mm-hmm.
>> And in this particular case, I know those followers are a little bigger than the mold, so I'm not going to go all the way to the registration mark.
I'm going to clamp the tapered end, and then I'm going to clamp the lapper end.
This was going to hold our piece together... >> TOM: All right.
>> ...while we set our copper tacks.
So the copper tacks will find their way into the holes that we drilled.
But, as you know, there's no holes on this side, because what's going to happen is when that copper tack goes through and hits the steel pipe, it will create a hook or a peen that'll hold it together.
That's all that holds the box together.
>> TOM: Oh.
>> The box is hundreds of years old, but it's still together because just of the copper tack.
We're going to use our number one and a half tack.
And then as I go through, you can hand me one of the copper tacks.
Go ahead and set it right in that hole.
>> TOM: Those are awfully tiny.
>> Yep.
(ball peen tapping) >> TOM: There's no need for glue on this box.
>> Right.
(ball peen tapping) >> Okay, Tom.
>> TOM: That looks awesome.
>> You have your first oval box.
>> TOM: Whoo-hoo!
So what do we do next, John?
>> Well, in order for the box to hold its shape, we're going to follow the box or chase the box with these formers, here.
>> TOM: Okay.
>> And again, if you remember, this row of tacks is very important.
We lined them up on the mold, and now we want to line up the followers with the appropriate mark on the follower.
And we're also using a top.
So here we have the box mark, which lines up with those tacks, and then this goes in, and we get a nice squeaky fit.
And then we put the bottom in.
We also line up the B for box.
>> TOM: Okay.
>> On those tacks, and it also goes in with a nice squeaky fit.
>> TOM: Wow.
>> So now we have what we consider the mold for the lid, because the lid is made on the box, it's not made on the mold.
And the lid is also three-quarters of an inch longer than the box itself.
And each lid is unique to each box.
So we're going to go back into our bath.
>> TOM: Mm-hmm.
>> So what I'm going to do... remember, now, this back row of tacks is important.
This is the registration.
So when I take this band out of the water, what I'm going to do is I'm going to line up those two tacks on the lid with the tacks on the box.
And then in one sweep, what we do is we just wrap the lid on the box.
>> TOM: Nice.
>> (grunts) >> TOM: Nice and tight.
>> So again, we do a registration mark.
>> TOM: Okay.
>> Now, this registration mark, we will almost come back to it.
We want the lid to come on and off the box with some ease.
The Shakers would've gone beyond the line-- they want it to be spill-proof.
A real Shaker box would be hard to get the lid off of.
>> TOM: Hmm.
>> So now that we have this, we can go ahead and separate it, slide it off.
>> TOM: Okay.
>> And we're going to go back to the registration mark again.
>> TOM: Okay.
>> We're going to come up just shy of it.
We're also going to clamp again.
And if you want to grab a tack, Tom... >> TOM: Okay.
>> ...we will go ahead and start in the middle.
>> TOM: Okay.
>> Yep, so we start in the middle.
(ball peen tapping) Do the two back ones.
(ball peen tapping) What we need to do is we need to take these two tacks, line them up with the top of the box.
>> TOM: Okay.
>> So we line up the tacks with that row of tacks, and then we massage the lid around and squish it down, take it flush, and now our box is ready for a 24-hour dry.
>> TOM: And then we'll be ready to make our tops and bottoms.
>> Correct.
>> TOM: Great.
For the materials for our top and bottom, you like to go with something that stays very flat and stable dimensionally over time, which is this quarter-inch MDF.
>> Mm-hmm.
>> TOM: It's veneered both sides with cherry.
>> Mm-hmm.
>> TOM: We've got our material sized.
We've got to get them cut to size for the top and bottom.
>> Correct.
>> TOM: How do you do that?
>> Well, go ahead and take our followers out.
And that's the reason for the holes.
>> TOM: Okay.
>> One of the reasons.
The other one is so it'd dry.
So, and I take the lid, and I make sure that I flip it over like this, and I go to trace it.
And when I trace it, remember tapering to infinity?
>> TOM: Mm-hmm.
>> That little area of tapering to infinity now becomes our new registration mark.
>> TOM: I see, sure.
>> So, I'll go ahead and trace this lid.
>> TOM: Mm-hmm.
>> You stay a 16th away from that line.
>> TOM: Okay.
>> And I'll have enough to sand to the line.
(bandsaw running) >> TOM: So we've got our top and bottom all sawn out, staying off the line like you said, John.
>> Very good, Tom.
But they don't fit, because you did go larger.
>> TOM: Okay.
>> And you remember, our new registration is no longer this row of tacks, but the inside taper to infinity, so the lid here would want to line up.
But as we see... and there's a reason for this.
Because what I'm going to do now is I'm going to taper this lid as we sand to the line at one and a half degrees, so we get a snug fit when it goes in.
>> TOM: Great, let's see that.
>> Okay.
♪ ♪ >> TOM: Whoo!
Very nice.
♪ ♪ Wow.
All right, so now we just have to secure the top and the bottom to the band.
>> Mm-hmm.
>> TOM: And to do that, we'll pre-drill and tap in some pegs.
>> That's correct.
>> TOM: All right, let's head over and do that.
So to secure our tops and bottoms, we're going to tap in these pegs that are barely visible once they're in.
We first want to pre-drill the holes.
Now, John, you've got a pretty cool, nifty homemade jig here to drill these tiny little peg holes?
>> Mm-hmm.
Again, we have a 16th-inch drill bit, like we used on the fingers, and we want the peg to capture the box to a certain depth, so this fence here is a stop fence.
So when you go ahead and drill them in location, you will go in, maybe break the chip, come out a little, and then go back in and come to the fence.
>> TOM: Okay.
(drill running) >> TOM: Whew!
That's it?
How does those look, John?
>> That's it, Tom-- yes, very good.
>> TOM: So now let's set some pegs.
>> Right.
>> TOM: Now, are you hand-making your pegs?
>> I'm turning them individually on my lathe.
>> TOM: Get out of here!
Actually, the pegs are toothpicks, round toothpicks you can snip in half and get two pegs out of a toothpick.
That's a pretty good yield.
>> What we do is I'll take the box, and I will go ahead and press in with my fingers.
So I'll hand it to you with these six pegs.
And it's six pegs in every box.
So you go ahead and do that.
>> TOM: Okay.
(ball peen tapping) Doesn't take much-- I can hear them kind of bottom out a little bit.
>> Wedging in there.
You can do the lid.
>> TOM: That one, all right.
>> And I'll go ahead and begin to remove them.
I'm going to use this pair of clippers, get as close to the base as I can.
They're sitting a little proud because of where I've clipped it.
I'm going to hand the box back to you, Tom, and I want you to finish the tack in this box by driving it flush with the band.
(ball peen tapping) >> TOM: Are you aiming at me with those things?
>> Yes.
>> TOM: I got to get my safety glasses with you.
(John chuckles) So we're getting our box final sanded, beginning with leveling the pegs, if needed.
>> You'll need to soften the outside edge of the lid, and I will also soften the inside band of the box so there's no sharp edges.
>> TOM: Right.
>> And once we're convinced all our edges are softened, we're ready for the finishes.
>> TOM: Yeah, mine's feeling good.
All right, so, for finish, we're going to begin with the interior.
>> Correct-- we'll use a food-safe wax.
>> TOM: Okay.
>> Simply carnauba, beeswax, and a little mineral oil.
That way... and then you go ahead and do the corner and the lid, and then I will take the rag and fill in the bottom.
That will take the excess off.
>> TOM: Yep, right, right.
>> Get the top to go on easier.
>> TOM: Okay, I've got mine set.
You're done?
>> I'm all done.
>> TOM: Okay.
Now we're ready to hit the exterior.
And for that, we're going to use a Danish oil-- just a simple, thin oil finish that you can easily wipe on.
So we want to just get this on the outside.
Wow, look at that.
>> Beautiful.
>> TOM: And now it really starts to come together.
That finger is really a sweet detail.
All right, I'm looking good here.
I think when you're done with that first coat, we're just going to wipe off the excess.
And we're going to let that set for 12 or 24 hours, then another coat.
And then after our third coat, we'll rub out with fine steel wool and a wax, and we're done.
Let's see how it goes together.
Oh, yeah, that's awesome.
Well, there you have it-- a classic Shaker oval box.
♪ ♪ Join me next time for more great projects right here on Classic Woodworking.
♪ ♪ >> Closed captioning is provided by AWFS, the Association of Woodworking and Furnishings Suppliers.
Funding is provided by... >> Woodworking is a passion.
Woodcraft understands that.
We offer name brands and tools for fine woodworking.
Woodcraft, proud sponsors of Classic Woodworking.
And by Felder.
>> It's not only about work.
It's about fun and success.
We are with you.
Felder Group is your partner for your woodworking projects.
♪ ♪ >> And by SCM-- a rich heritage of woodworking technology since 1952.
Master your craft by joining Fine Woodworking Unlimited.
For $99 a year, or $9.99 a month, you'll get unlimited access to over 40 years of woodworking articles and tips, over 700 projects and plans, including projects from this season of Classic Woodworking in association with Fine Woodworking, and videos from renowned masters of the craft, plus the online archive of every issue ever published.
To get started on your 14-day free trial, go to finewoodworking.com/pbsoffer or call 1-866-452-5141.
Visit finewoodworking.tv to get complete details on this episode, download the full plan and materials list, watch behind-the-scenes clips, and find more instruction for making today's project.
♪ ♪


Support for PBS provided by:
Classic Woodworking is presented by your local public television station.
Distributed nationally by American Public Television